✨ Why You Might Want to Make a Multimedia Collage

It tells a story
Making a multimedia collage is more than an art project—it’s a way to tell a story, preserve a moment, or honor a person in a deeply personal way. I’ve always loved working with mixed materials because they allow emotion, memory, and creativity to exist together on the same surface. A collage doesn’t need to be perfect or polished to be powerful; in fact, it’s often the layered, imperfect details that make it feel alive.
It makes an unforgettable gift
Some of the most meaningful collages I’ve created weren’t made for display in a gallery—they were made as gifts. When you give someone a piece of art that reflects their life, interests, memories, or personality, it can be incredibly touching. It shows care, attention, and thought in a way few store-bought gifts ever could. A collage says, I see you. I know what matters to you.
It Invites Experimentation
Multimedia collages invite experimentation. You can combine printed photos, handwritten notes, decorative papers, paint, chalk, fabric, or found objects—anything that helps tell the story you want to share. Whether you’re creating something small on paper or a large canvas statement piece, the process itself is creative, intuitive, and often surprisingly joyful. There’s no single “right” way to do it, only your way.
In this guide, I’ll walk you through how to create a multimedia collage step by step, share ideas for gathering meaningful materials, and show examples of finished pieces for inspiration. You’re welcome to borrow ideas, adapt styles, or use the examples as a jumping-off point—but chances are, once you start, your collage will take on a life of its own.
🌱 Why Multimedia Collages Feel So Meaningful
Multimedia collages are one of my favorite creative outlets, and they’ve become some of the most touching gifts I’ve ever given.
When you make art specifically for someone, it lands differently. It feels personal. It feels seen.
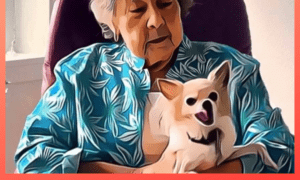
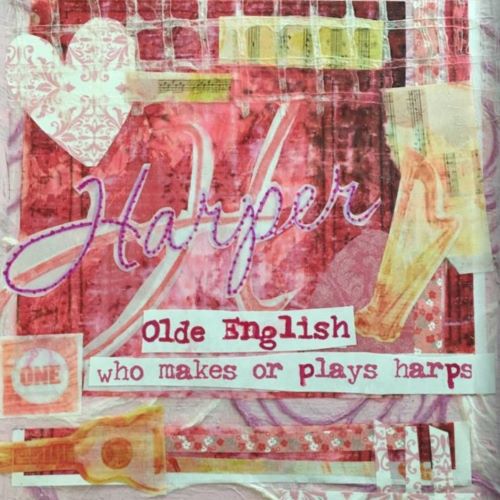
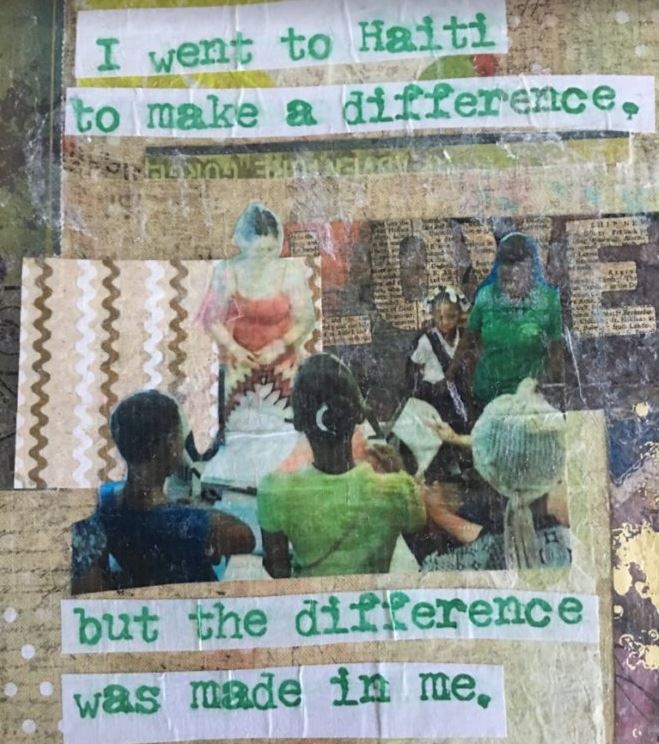
The collage shown here was a project I made for a friend to give to a relative as a graduation gift. I gathered inspiration by looking through her Facebook page — photos, interests, hobbies, little clues about who she is. I asked about her background, where she went to school, and what mattered to her.
I printed photos onto plain paper and layered them with decorative papers, paint, chalk, and texture to create something uniquely hers.
That kind of attention turns art into connection. And that’s a powerful kind of happiness.
Affiliate Disclosure: This page may contain affiliate links. If you make a purchase through these links, I may earn a small commission at no extra cost to you.
🧠 How to Make a Multimedia Collage (Step-by-Step)
1. Get Inspired First
Start with curiosity, not a plan.
Look through photos, memories, social media, or meaningful themes. One of my favorite ways to spark ideas is flipping through collage books filled with examples and techniques.
I also love using photo-editing apps like Canva or Photo Lab to “artify” photos before printing them. Even using just a portion of a photo can be enough to tell a story.
2. Choose Your Surface
Any size works. Truly.
Some favorites:
-
Small wood blocks like 6″ x 6″ are incredibly fun and manageable
-
11″ x 14″ wood panels are perfect for more detail. I prefer the deeper cradle.
-
Stretched canvases work beautifully for statement pieces,
I have collages hanging in my home that range from tiny blocks to a 4′ x 4′ canvas.
3. Gather Simple Supplies
You don’t need fancy tools or precision. This is not that kind of art.
These are the supplies I use most often:
-
Acrylic medium (think of this like the Mod Podge idea)
One surface I genuinely love working on is Claybord. It’s beautifully finished, doesn’t require framing, and makes even simple collages feel elevated.
Ampersand Cradled Claybord (8″ × 8″)

4. Build the Collage
This is where the magic happens.
-
Select your idea or person
-
Arrange pieces loosely using temporary adhesive
-
Layer paint, papers, photos, pastels, and texture
-
Brush a medium over the surface once you like the composition
Personal tip: When I’m finished, I cover the piece with wax or parchment paper and gently smooth it out. I put the artwork under something heavy, even a stack of books, so it dries flat. Sometimes wrinkles happen. Sometimes they add character.
Let it dry overnight, then peel the paper away.
Add another layer if you want. Or don’t.
-
Stop When It Feels Done
There are no rules.
If it makes you smile, it counts.
⏱️ Time Required to Make a Multimedia Collage
Anywhere from 30 minutes to a few evenings
You can stop and restart whenever inspiration returns
🎈 Make It Yours
-
Turn it into a vision board
-
Make one as a deeply personal gift
-
Create a series of small collages instead of one big one
-
Copy ideas you love and then follow your own instincts
💬 Gentle Reminder
You are not trying to make something perfect. You are making something felt. That is enough.
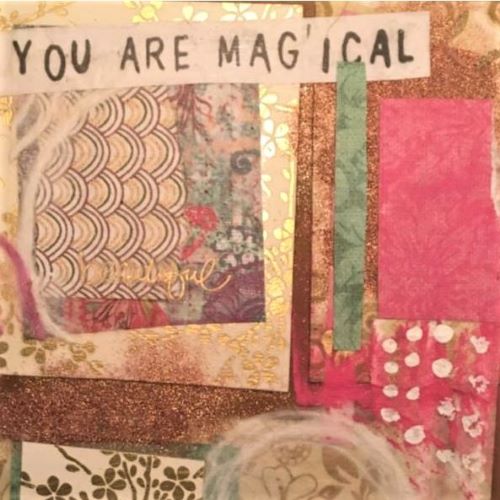
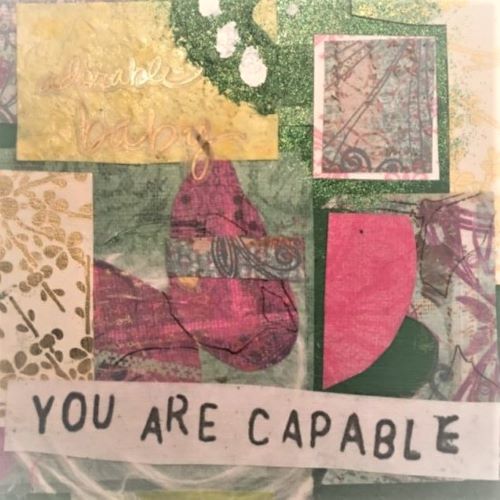
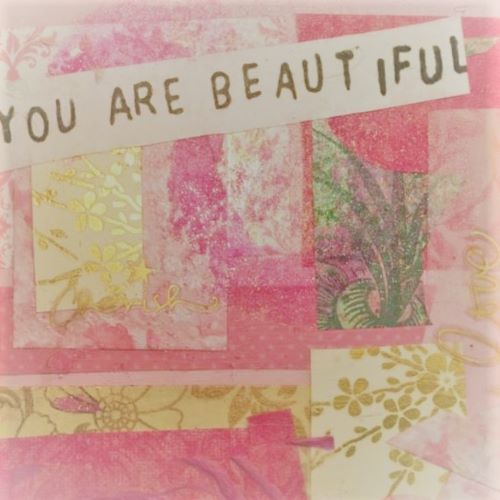
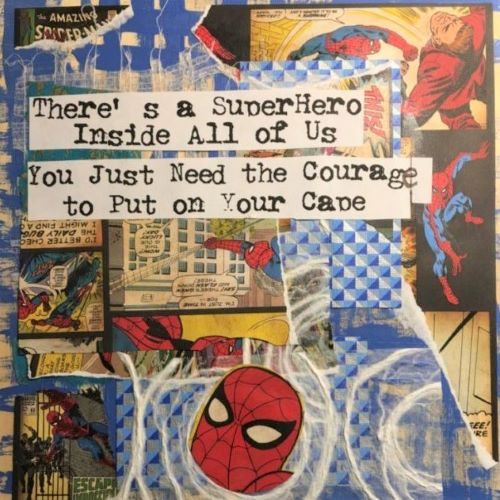
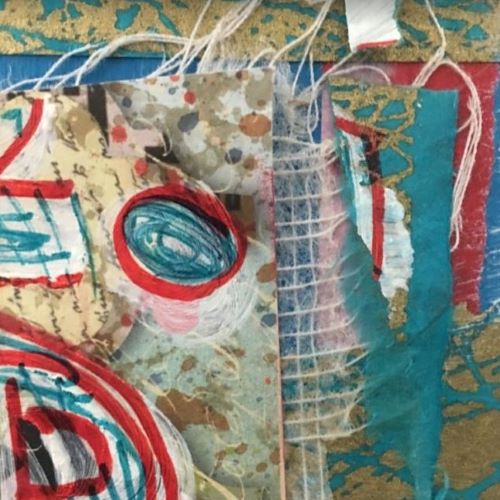
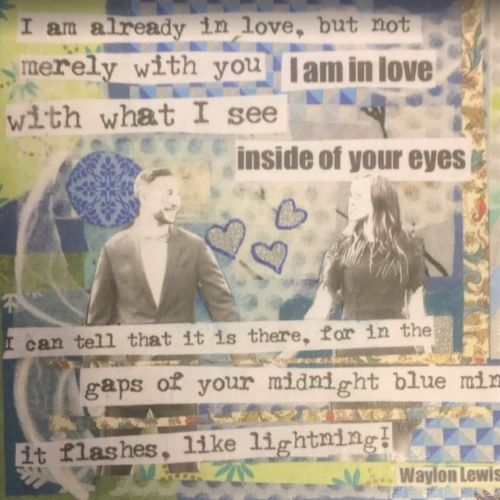
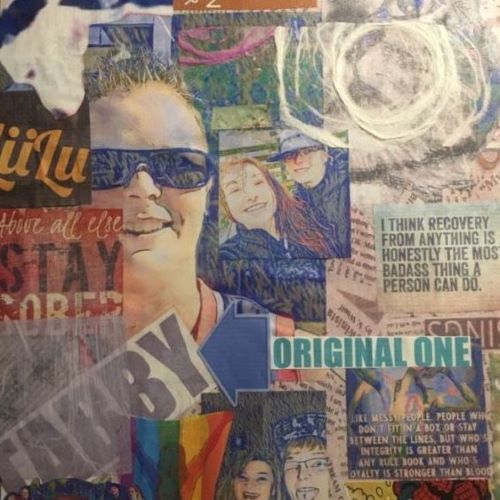
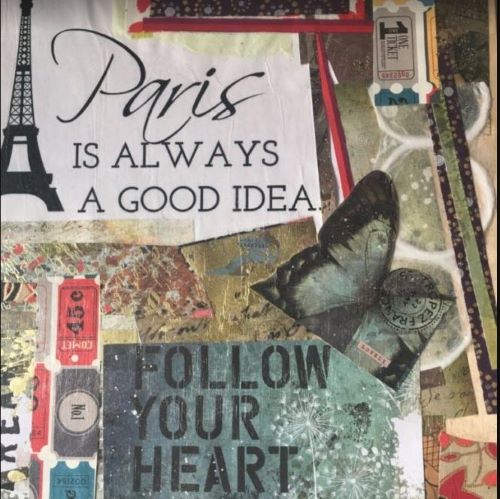
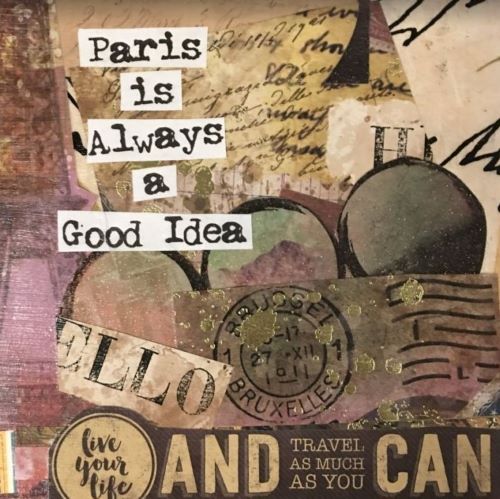
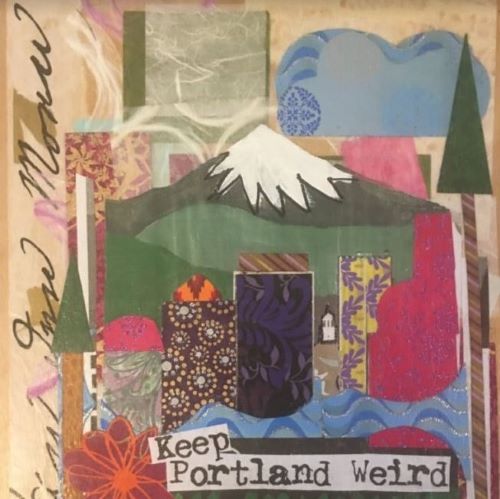
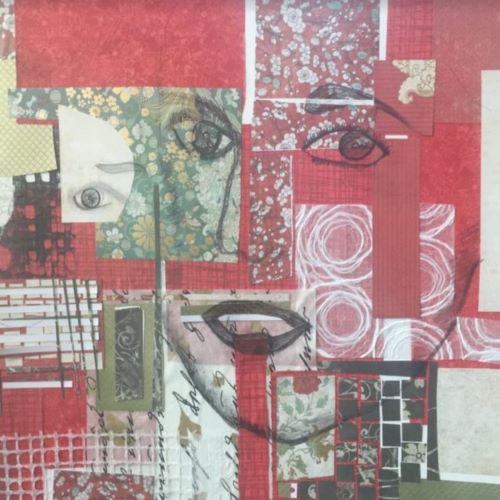
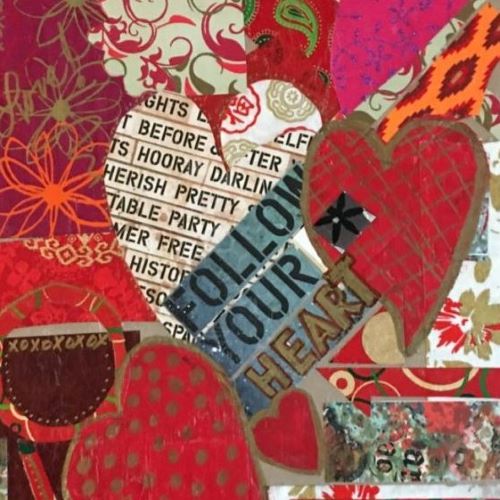
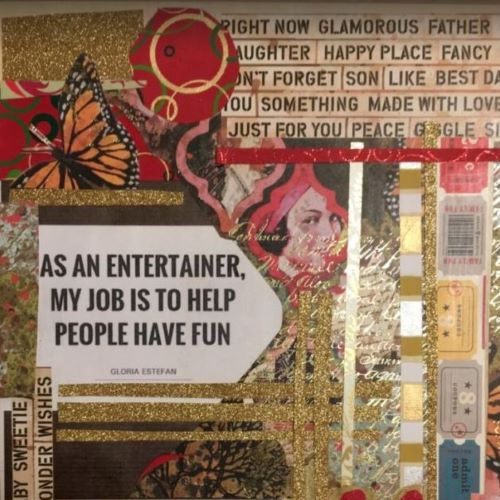
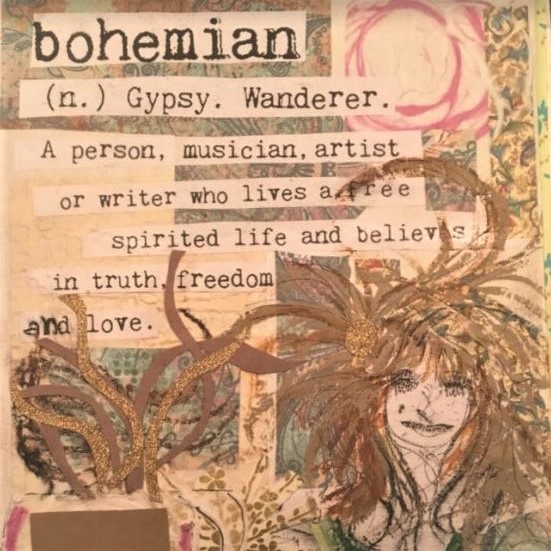
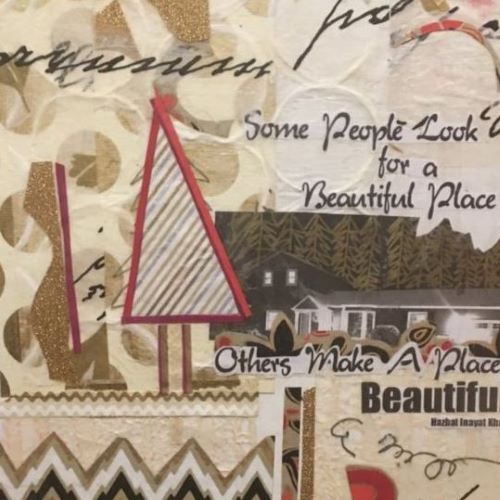
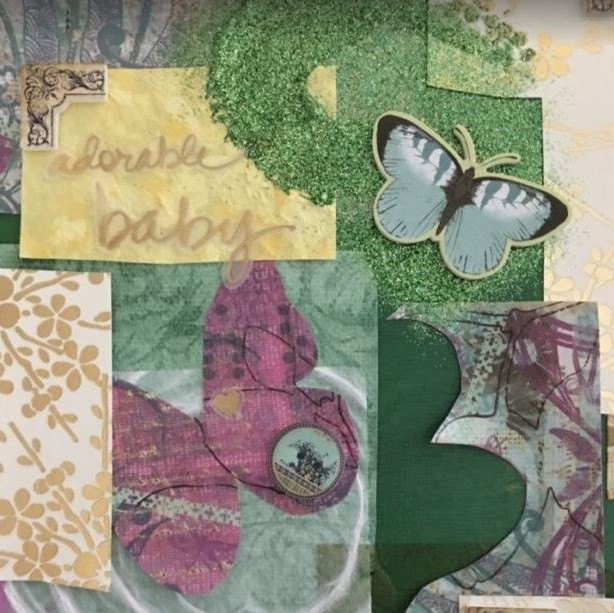
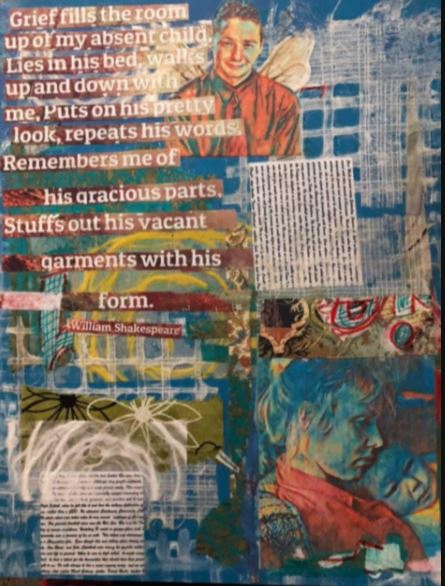
🖼️ My Collage Gallery: Helping You Make a Multimedia Collage
Below is a gallery of my own work. Some pieces are small, some are large, and some are close-ups of much bigger collages. I sized them consistently for the website, but feel free to imagine them at full scale.
Use them for inspiration. Copy them. Remix them. Make them your own.


Other Related Articles
Visualizing Joy: Create a Fantastic Vision Board for More Happiness
Affiliate Disclosure: This page may contain affiliate links. If you make a purchase through these links, I may earn a small commission at no extra cost to you.
Posts